For the complete documentation index, see llms.txt. Markdown versions of all docs pages are available by appending .md to any docs URL.
Non-agentic HTTP traffic
Route HTTP traffic to a non-agentic backend such as httpbin with the agentgateway binary.
Verified Code examples on this page have been automatically tested and verified.Use the agentgateway binary to route HTTP traffic to a simple backend (httpbin) running locally.
    flowchart LR
    A[client] -->|localhost:3000| B[agentgateway]
    B --> C[httpbin]
- The client sends requests to agentgateway on port 3000.
- Agentgateway forwards the requests to the httpbin backend based on the route and backend configuration.
- Httpbin responds, and agentgateway returns the response back to the client.
Before you begin
Install the agentgateway binary.
Download and install the agentgateway binary. Alternatively, you can manually download the binary from the agentgateway releases page.
To install the latest release:
curl -sL https://agentgateway.dev/install | bashExample output:
  % Total    % Received % Xferd  Average Speed   Time    Time     Time     Current
                                 Dload  Upload   Total   Spent   Left    Speed
100  8878  100  8878    0     0  68998      0 --:--:-- --:--:-- --:--:-- 69359

Downloading https://github.com/agentgateway/agentgateway/releases/download/v1.5.0/agentgateway-darwin-arm64
Verifying checksum... Done.
Preparing to install agentgateway into /usr/local/bin
Password:
agentgateway installed into /usr/local/bin/agentgateway
- Install Docker to run httpbin.
Steps
Step 1: Start httpbin in Docker
Run the httpbin image so it listens on port 80 inside the container. Map it to a host port such as 8000 so that agentgateway can reach it.
docker run --rm -d -p 8000:80 --name httpbin kennethreitz/httpbinVerify that httpbin responds.
curl -s http://localhost:8000/headers | head -20 || trueExample output:
{
  "headers": {
    "Accept": "*/*",
    "Host": "localhost:8000",
    "User-Agent": "curl/8.7.1"
  }
}
Step 2: Configure agentgateway to route to httpbin
You add the gateway and route from the UI, so you can start agentgateway without a config file. When you run agentgateway without specifying a config, it bootstraps a basic config at ~/.config/agentgateway/config.yaml and uses it automatically.
In a separate terminal, start agentgateway.
agentgatewayOpen the agentgateway UI.
- On the first run of the UI, the welcome wizard already enables the API row, because the bootstrap config includes a gateway. Click Continue.
- If you already opened the UI, the Gateway Overview home page shows the Traffic row enabled.
Add a gateway.
In the Traffic section of the navigation menu, click Gateways.
Click Add gateway, enter
httpbinfor the Name and3000for the Port, and click Save gateway.The bootstrap config already created a gateway named
defaulton port 4000. The namedefaultis reserved for it, so give the new gateway a different name.
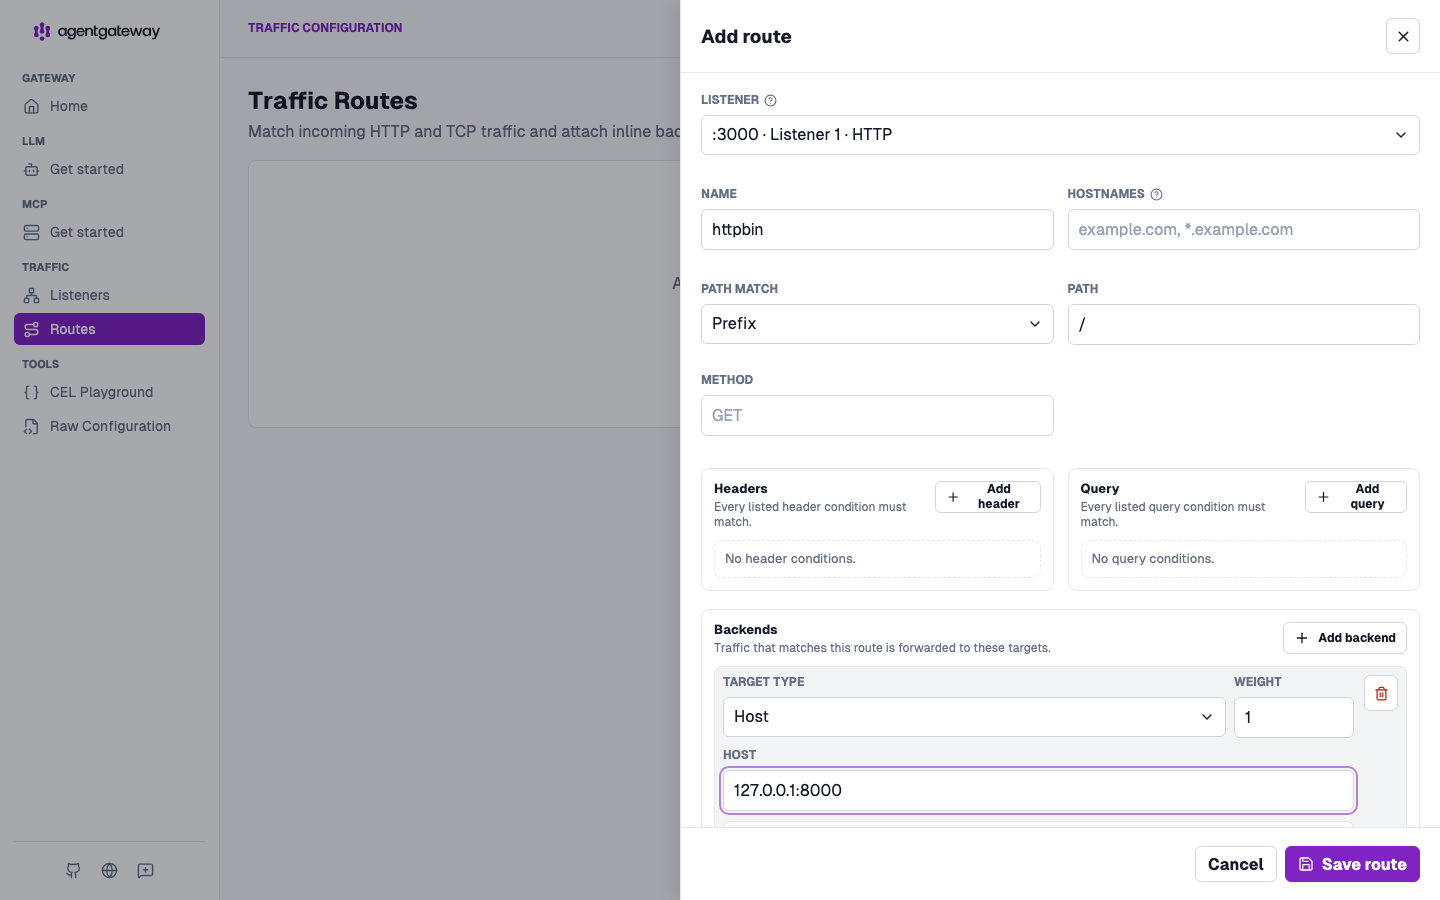
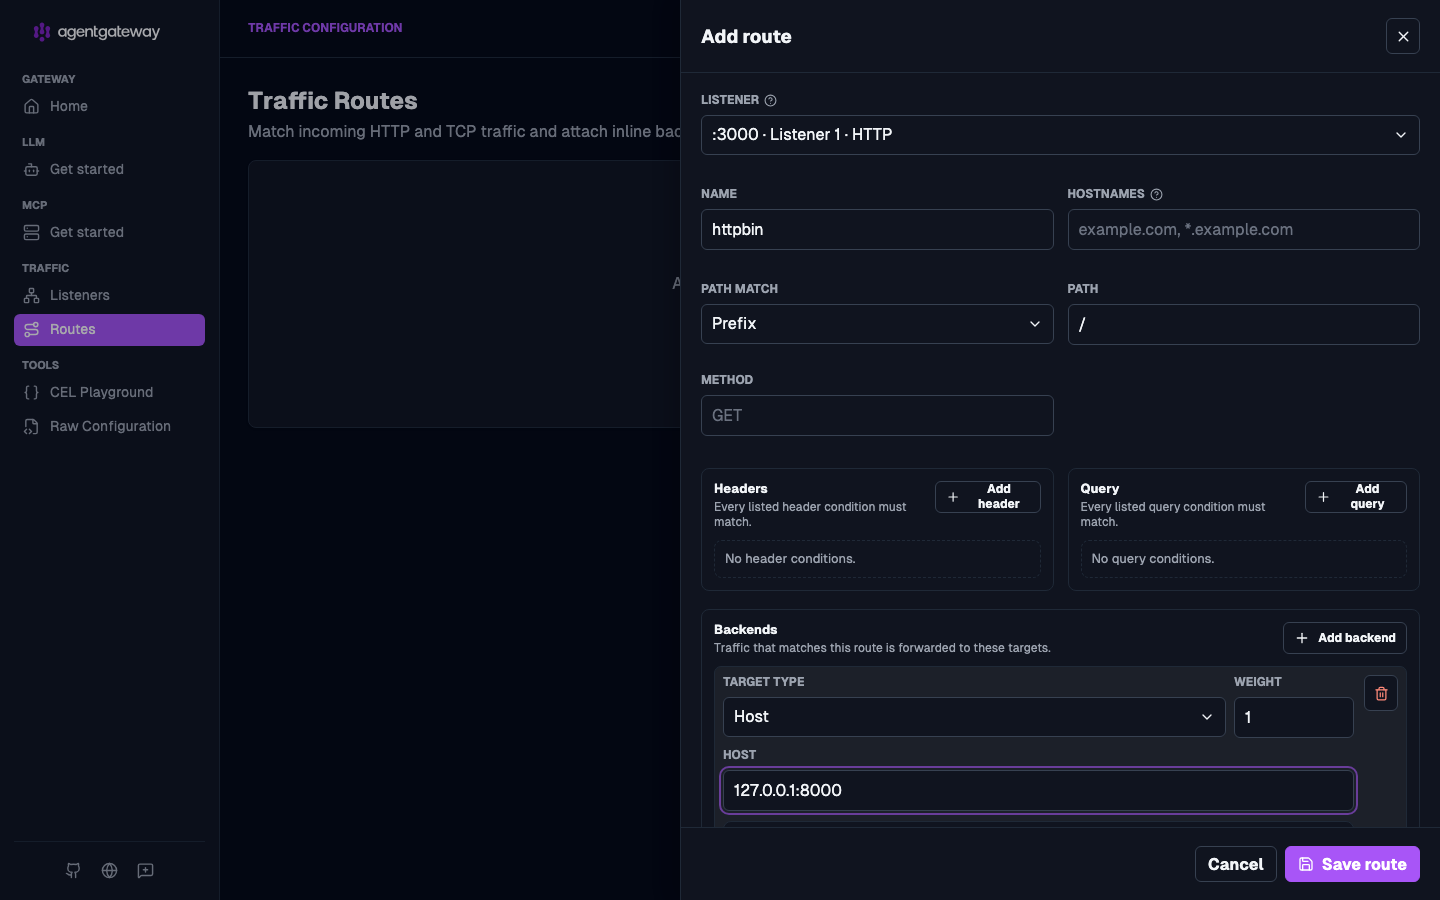
Add a route to httpbin.
- Click Routes, and then click Add route.
- For the Gateway, select the
httpbingateway you created. - For the Name, enter
httpbin. Save route stays disabled until the route has a name. - Under Backends, click Add backend, keep the Host target type, and enter
127.0.0.1:8000for the host. - Click Save route.
Step 3: Send a request through agentgateway
Send a request to agentgateway on port 3000. Agentgateway forwards it to httpbin; the response is returned to you.
curl -i http://localhost:3000/headersExample response (status and headers):
HTTP/1.1 200 OK
content-type: application/json
...
Example JSON body:
{
  "headers": {
    "Accept": "*/*",
    "Host": "localhost:3000",
    "User-Agent": "curl/8.7.1"
  }
}
You can try other httpbin endpoints through agentgateway, such as the following.
curl -s http://localhost:3000/get
curl -s http://localhost:3000/post -X POST -H "Content-Type: application/json" -d '{"key":"value"}'
Step 4 (Optional): Stop httpbin
When you are done, stop and remove the httpbin container.
docker stop httpbinNext steps
Check out more guides for managing your APIs with agentgateway.